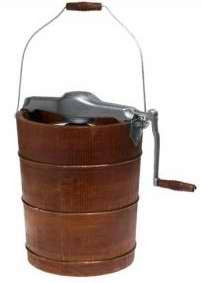
hand cranked ice cream maker image

ladii.hype
So can you? Can use substitute white sugar with brown sugar in homemade ice cream?
I'm just wondering. If there's a recipe for great homemade ice cream that doesn't need an ice cream maker, that would be great! If there's one that uses brown sugar that would be wonderful too! Haha.
Thanks so much! The help is appreciated!
Answer
Brown Sugar Ice Cream
1 1/2 cups milk
3 large beaten eggs
1 1/2 cups whipping cream
1 teaspoon vanilla extract
3/4 cup packed brown sugar
4 medium peaches, peeled, pitted and finely chopped
1/2 cup packed brown sugar
1 tablespoon lemon juice
The first step in making homemade ice cream is to cook the eggs and milk. This step ensures the ice cream will be safe to eat by killing any bacteria.
Pour the milk into a heavy medium saucepan. Cook the milk over medium heat until bubbles begin to form around the edges. Stir the hot milk into the beaten eggs. Return the egg and milk mixture to the saucepan. Cook over medium heat for 2 minutes, stirring occasionally. Remove from the heat and transfer the mixture to a large bowl or heat-proof pitcher.
Stir in the whipping cream and vanilla. Then add the 3/4 cup brown sugar, stirring until the sugar is dissolved. Cover and refrigerate until well chilled.
While the cream mixture is chilling, stir together the peaches, 1/2 cup brown sugar, and lemon juice. Stir the peach mixture into the chilled mixture.
Pour the chilled mixture into the ice cream freezer can. Cover tightly with the lid. Fit the can securely into the ice cream freezer. Alternately pack layers of crushed ice and rock salt into the outer container. Do not use table salt. Table salt dissolves too quickly. You can buy rock salt (sometimes called ice cream salt) at the grocery store. Use 6 parts ice to 1 part rock salt. Fit the motor into place and secure. Turn on the motor. The ice cream is done when the motor begins to strain. If you're using a hand-cranked ice cream maker, the ice cream is done once the crank becomes difficult to turn.
When the ice cream is done, remove the ice to below the level of the can lid. This prevents melted ice from seeping into the can. Wipe the can and lid with a damp cloth to remove any ice and salt clinging to the can. Remove the lid and the dasher. Scrape ice cream from the dasher back into the can.
Resist spooning into your fresh batch of homemade ice cream until it ripens. During the ripening process, the ice cream hardens and becomes smoother. After you have removed the dasher, cover the can with several layers of waxed paper or foil. Plug the opening in lid with a cork and replace the lid. If necessary, drain off any excess water in the tub. Pack more crushed ice and rock salt into the outer container using 4 parts ice to 1 part salt. Cover the freezer with heavy cloth or newspaper and let the ice cream ripen about 4 hours.
Remove the can from the freezer and wipe it with a clean damp cloth. The ice cream is now ready to enjoy. After the first spoonful, you'll know it was worth the wait.
Makes about 2 quarts.
How to make ice cream without a maker
To make two servings of homemade ice cream without an ice cream maker you'll need 2 cups of whole milk, 4 tablespoons of sugar, and 1 teaspoon of vanilla extract. You'll also need ½ cup of table salt, a half-gallon of ice cubes, and 2 gallon-size plastic zipper bags.
Optional Ingredients
Optionally you can make it with cream used for whipped topping if you prefer a thicker richer treat, and you can include a number toppings and stir-ins. Consider adding chopped nuts, bits of candy, or colored sprinkles, and top it with a dollop of whipped topping. You can also use this homemade frozen confection to make shakes and sundaes. Turn ordinary vanilla into frozen flavored treats with strawberry jam, chocolate sauce, caramel, or anything else that's sweet and delicious. Even peanut butter tastes great when added to this homemade treat that doesn't require an electric or old fashioned crank-style frozen confection maker.
Procedure
Begin by filling the first plastic zipper bag halfway with ice cubes and pour the table salt on top of the ice. Close the zipper bag and mix the salt with the ice. The mixture will become very cold very quickly.
Next, pour the milk or cream into the second zipper bag, and add the vanilla and sugar along with any bits of candy or sprinkles. Tightly close the bag containing the ingredients, and place it inside the bag filled with ice and salt. Shake the bag to blend the ingredients for approximately 10 minutes, or until it becomes solid. Once the ingredients are frozen, the mixture is ready to serve and eat.